


You can increase your e-bike speed through voltage upgrades, controller modifications, tire optimization, and aerodynamic improvements. However, top speed is primarily determined by your battery voltage and motor winding (KV rating), not wattage. A 48V system typically maxes at ~35 mph, while 60V+ systems can exceed 40 mph.
Want to unlock more speed from your electric bike? You're not alone. Whether you're looking to keep up with traffic, reduce commute time, or simply experience the thrill of a faster ride, there are proven methods to safely increase your e-bike's performance.
Before we dive into the techniques, you need to understand three critical factors. First, check your state regulations concerning e-bike speed limits—most US states limit Class 3 e-bikes to 28 mph on public roads. Second, know your bike's maximum safe speed based on its frame, brakes, and components. Third, understand that modifications may void your warranty and affect insurance coverage.
Riding at extremely high speeds reduces battery lifespan, decreases range, and significantly increases safety risks. Standard bicycle brakes become inadequate above 25-30 mph, and stopping distances can exceed 100 feet. With these considerations in mind, here are 11 expert-backed methods to make your e-bike faster.

Understanding What Actually Makes E-Bikes Faster
Before modifying anything, you need to understand the physics of e-bike speed. Many riders mistakenly believe that wattage determines top speed—it doesn't.
Top speed is determined by three factors: battery voltage (V), motor winding speed (KV rating), and wheel diameter. Voltage sets the maximum RPM your motor can achieve. Motor winding determines how many rotations per volt the motor produces. Wheel size converts motor RPM into ground speed.
According to electrical motor principles, back EMF (electromagnetic force) limits maximum motor speed based on voltage.A 48V battery system physically cannot drive a motor fast enough to exceed approximately 35 mph, regardless of how many amps you pump through it, because back EMF limits the motor's maximum RPM at that voltage.This is why voltage upgrades are the most effective speed modification.
| Battery Voltage | Typical Top Speed | Use Case | Relative Cost |
|---|---|---|---|
| 36V | 20-25 mph | Casual riding, bike paths | $ |
| 48V | 28-35 mph | Commuting, Class 3 legal | $$ |
| 52V | 32-38 mph | Performance riding | $$$ |
| 60V | 38-42 mph | Off-road, private property | $$$$ |
| 72V | 45+ mph | Electric motorcycle territory | $$$$$ |
Wattage affects acceleration and hill-climbing ability. A 1500W motor accelerates faster and climbs better than a 750W motor, but if both are 48V systems, their top speeds will be nearly identical. Understanding this distinction prevents wasting money on ineffective modifications.
Keep the Battery Charged
Battery charge level directly affects available voltage, which limits top speed. A fully charged 48V battery actually delivers 54.6V, but as it discharges to 50% capacity, voltage drops to approximately 48V—reducing your top speed by 10-15%.
Keep your battery fully charged before rides where speed matters. Consider taking an extra battery if you're going on long-distance journeys where you want to maintain peak performance.
Even the fastest e-bike will underperform with a depleted battery. Lithium-ion batteries deliver maximum power between 80-100% charge. Below 50%, voltage sag becomes significant, especially under high current draw during acceleration or climbing.
Best Charging Practices for Performance
Always charge your battery after every ride and store it properly. Avoid overcharging—most modern batteries have BMS (Battery Management Systems) that prevent this, but it's still good practice to unplug once fully charged.
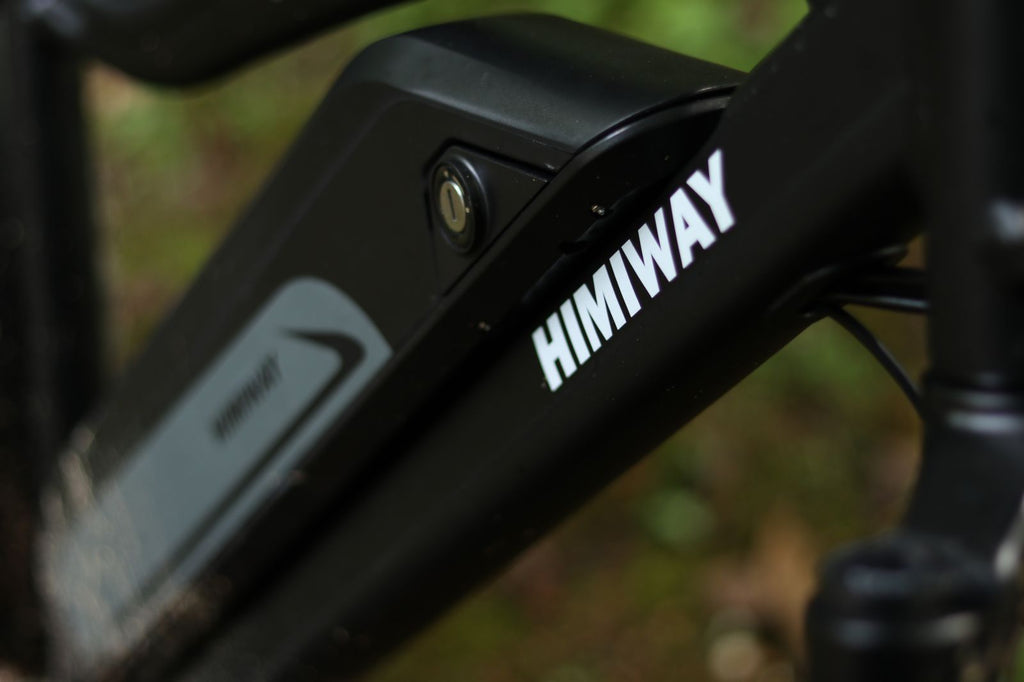
Check the appropriate charging duration in your manufacturer's manual. For instance, the Himiway Zebra model is fully charged within 7 hours using its 48V 20Ah Samsung/LG battery. This battery can cover 60 miles on a single charge and 80 miles with pedal assist—maintaining strong performance throughout.
Store batteries at 50-80% charge in cool, dry locations (40-70°F ideal). Extreme temperatures degrade battery chemistry and reduce both capacity and voltage output, directly impacting your top speed.
Opt for a Battery with Higher Voltage
Upgrading to a higher voltage battery is the single most effective way to increase top speed. This modification directly raises the motor's maximum RPM, translating to higher speeds without compromising torque or acceleration.
The voltage rating indicates the maximum voltage the battery produces when fully charged. A 48V battery delivers 54.6V at full charge, while a 52V battery delivers 58.8V—this 8% voltage increase typically adds 2-3 mph to top speed.
Voltage Upgrade Considerations
Before upgrading voltage, verify three compatibility factors. First, your controller must handle the higher voltage—most 48V controllers can safely handle 52V, but 60V+ requires a new controller. Second, your motor must be rated for the increased voltage to prevent overheating. Third, check that your BMS and wiring can handle the electrical load.
According to experienced e-bike modifiers in online communities, the 48V to 52V upgrade is the most popular because it offers noticeable speed gains with minimal risk. However, jumping from 48V to 72V requires replacing the motor, controller, and often the display—essentially a complete electrical system overhaul costing $800-1500.
You also need to ensure your e-bike controller can handle whatever voltage increase you're planning. Controller ratings specify maximum voltage (like 48V or 60V) and maximum continuous current (like 25A or 35A). Exceeding these specs damages the controller and creates fire risks.
Upgrade or Reprogram the Controller
Your controller is the brain that regulates power delivery from the battery to the motor. Many e-bikes ship with controllers that artificially limit speed to comply with regulations—even when the motor and battery can handle more.
If you're changing the battery voltage, you must find a compatible controller with matching voltage rating and appropriate KV motor characteristics. The controller manages not just speed limits but also current delivery, which affects acceleration and hill-climbing.
 Upgrade Path
Many aftermarket controllers offer higher amp ratings than stock controllers. Upgrading from a 20A controller to a 35A controller won't increase top speed, but it dramatically improves acceleration and hill-climbing performance.
Based on user reports from e-bike communities, upgrading to a 350W-rated controller enabled riders to reach 35-36 km/h (about 22 mph) with the same 250W motor. The motor label often indicates legal classification, not actual power capacity—many "250W" motors can safely handle 500-750W with adequate cooling.
Programmable controllers offer the most flexibility. These allow you to adjust parameters like current limits, voltage cutoffs, pedal assist levels, and throttle response curves. However, they require technical knowledge and proper setup to avoid damaging components.
Field Weakening: Advanced Speed Technique
Some advanced controllers support "field weakening"—a technique that pushes motors beyond their rated speed by weakening the magnetic field. This can add 10-20% more top speed but generates significant heat and stresses both motor and battery.
Field weakening is controversial in the e-bike community. While it works, it substantially increases component wear and failure risk. Only attempt this with quality components and proper temperature monitoring.
Change the Motor (Advanced Modification)
Motor replacement is an expensive but effective modification for substantial speed increases. However, you need to understand motor specifications to choose correctly—simply installing a "more powerful" motor won't necessarily increase top speed.
Motors are characterized by their KV rating—the RPM per volt they produce. A 10KV motor spins at 10 RPM for every volt applied. Higher KV motors spin faster at a given voltage but produce less torque. Lower KV motors provide more torque but lower top speed.

Matching Motor, Controller, and Battery
When changing the motor, all three components must work together. Your controller voltage rating must match your battery voltage. Your motor's KV rating determines whether you'll have a high-speed bike with poor hill climbing or a torque monster that tops out at 25 mph.
For hub motors, you're also constrained by wheel size and frame spacing. Mid-drive motors offer more flexibility through gear ratios but cost significantly more and require compatible bottom bracket mounting.
Most riders seeking speed improvements are better served by controller and battery upgrades than motor swaps. Motor replacement makes sense primarily when your existing motor is failing or when you need a dramatically different power profile (like switching from city commuting to off-road use).
Upgrade to Performance Tires
Tire choice significantly impacts speed, efficiency, and safety. Riding with mud tires or heavy knobby tires on pavement is like driving a car with the parking brake partially engaged—you're wasting energy fighting rolling resistance.
The National Highway Traffic Safety Administration reported that tire-related issues cause about 11,000 accidents annually. For e-bikes, inappropriate tires reduce performance and increase puncture risk.
Tire Selection Strategy
Match your tires to your primary riding surface. For mostly paved roads and bike paths, choose smooth or lightly treaded tires with higher pressure ratings. These can add 1-3 mph to your top speed while improving range by 10-15%.
Fat tires like the 26" x 4.0" found on the Himiway Cruiser excel for off-road, snow, sand, and rough terrain. They provide excellent traction and stability but create more rolling resistance on pavement. If you rarely ride off-road, switching to 3.0" or narrower tires boosts efficiency.
Tire compound matters too. Harder rubber compounds roll faster but provide less grip. Softer compounds grip better but wear faster and create more resistance. Performance-oriented riders often accept shorter tire life for speed gains.
| Tire Type | Rolling Resistance | Speed Impact | Best Use |
|---|---|---|---|
| Knobby Fat (4.0"+) | High | Baseline (0 mph) | Off-road, sand, snow |
| Semi-Slick Fat (4.0") | Medium-High | +1-2 mph | Mixed terrain |
| Smooth Fat (3.0-4.0") | Medium | +2-3 mph | Paved roads, light trails |
| Performance Street (2.0-2.5") | Low | +3-5 mph | Pavement only |
Adjust LCD Settings for Maximum Speed
Many e-bikes artificially limit speed through display settings to comply with local regulations. Your bike may be capable of 30+ mph but restricted to 20 mph via software. Before spending money on hardware upgrades, check if your speed limiter can be adjusted.
LCD displays aren't just for monitoring—they control critical performance parameters. Even the best electric bikes update riders on battery capacity, odometer, pedal assist level, speedometer, and wattmeter through their displays.

How to Access Hidden Settings
Most e-bike displays have hidden configuration menus accessed through button combinations. Common sequences include holding the up and down buttons simultaneously for 5 seconds, or pressing up-down-up-down in quick succession.
Look for settings labeled "speed limit," "max speed," "wheel size," or "P-settings." Adjusting the speed limit parameter from 20 mph to 28 mph (or removing it entirely) immediately unlocks additional performance if your motor and battery can deliver it.
A multifunctional LCD like the one on Himiway models provides detailed component information. You can adjust settings for maximum, current, or average speed display. More importantly, you can modify pedal assist power levels and throttle response.
Wheel Size Parameter Manipulation
Some riders increase displayed speed by changing the wheel size parameter. If your bike has 26" wheels but you set the display to 20", it will underestimate speed and allow the motor to run faster before hitting the speed limiter. However, this makes your speedometer and odometer inaccurate.
Keep the Tires Properly Inflated
Tire pressure is the easiest, cheapest, and most overlooked speed modification. Under-inflated tires create a larger contact patch with the ground, increasing rolling resistance and dramatically reducing speed and efficiency.
When tire pressure is high (within safe limits), rolling resistance decreases substantially. Properly inflated tires roll more efficiently, reducing the power needed to achieve a particular speed. This matters even more for long-distance commutes.
Finding Your Optimal Pressure
Check your tire sidewall for the maximum pressure rating (typically 20-30 PSI for fat tires, 40-65 PSI for standard tires). For speed and efficiency, inflate to 80-100% of maximum rated pressure.
Use a quality pressure gauge—don't rely on squeezing the tire. Even 5 PSI below optimal creates noticeable resistance. For fat tire e-bikes, the difference between 15 PSI and 25 PSI can mean 2-3 mph in top speed and 15% better range.
Higher pressure also reduces puncture risk from sharp objects. However, comfort decreases with higher pressure—you'll feel every bump more directly. Balance speed goals with ride comfort based on your terrain.
Temperature affects pressure. Tires lose 1-2 PSI for every 10°F temperature drop. Check pressure weekly, especially with seasonal temperature changes, to maintain optimal performance.

Improve Aerodynamics with Better Positioning
At speeds above 20 mph, wind resistance becomes your primary enemy. Aerodynamic drag increases exponentially with speed—the power required to go 30 mph is nearly double what's needed for 25 mph, with most of that increase fighting wind.
Installing a windshield helps deflect wind and debris away from the rider, reducing drag and making it more comfortable to maintain high speeds for longer periods. However, you may notice minimal effect if riding an e-bike with low-speed capacity, as aerodynamic benefits only become significant above 20 mph.
Optimize Your Riding Posture
Your riding position creates a massive aerodynamic impact. Sitting upright presents maximum frontal area to the wind. Leaning forward and lowering your torso reduces drag by 20-30%, potentially adding 2-4 mph to your top speed with no mechanical changes.
The level of comfort affects riding efficiency. Prioritize balance and attain as much comfort as possible while still maintaining an aerodynamic position. Relax your upper body—tension creates rigid positioning that's both slower and more fatiguing.
Keep your weight balanced and maintain traction, especially when climbing hills. Your elbows must be slightly bent so you have full control of the bike at high speeds. This position also absorbs shocks when hitting road bumps, maintaining stability.
Consider weight capacity and distribution carefully. Check your manufacturer's guidelines for the recommended maximum weight capacity, which includes rider plus cargo. Excess weight reduces top speed, acceleration, range, and component lifespan.

Reduce Unnecessary Accessories
Every accessory creates drag. Large rear racks, loose bags, flags, and unnecessary gear all slow you down. If speed is your priority, minimize accessories or choose streamlined, aerodynamic options.
Tune Your Brakes to Reduce Drag
Improperly adjusted brakes create constant friction, acting like a speed governor. Even slight brake rub from misaligned calipers or bent rotors can reduce top speed by 1-2 mph while generating heat and wearing brake pads prematurely.
Make sure the e-bike brake is positioned correctly to minimize friction. When e-bikes constantly experience even minor friction, it slows down the speed rate noticeably over time.
Brake Adjustment Procedure
Spin each wheel and listen for any rubbing sound. Inspect your rotors for warping—they should spin without wobbling. If rotors are bent, they need to be straightened or replaced.
For mechanical disc brakes, adjust the caliper position so the rotor passes through the center of the brake pads without contact. For hydraulic systems, check pad wear and bleed the system if the lever feels spongy.
You can get mechanical tools to tune the brake system or hire a professional to do it. However, never attempt modifications to the brake system beyond basic adjustments. Brakes are critical safety components—improper work could cause brake failure, leading to serious accidents.
Upgrade Brakes BEFORE Increasing Speed
This point cannot be overstated: if you're increasing your e-bike's speed above 28 mph, you must upgrade your brakes first. Standard mechanical disc brakes designed for 20 mph bikes are dangerously inadequate at 35+ mph.
Online e-bike communities frequently discuss this issue. Riders who boost speed without brake upgrades report frighteningly long stopping distances—sometimes 100+ feet from 35 mph. At these speeds, high-quality hydraulic disc brakes with 180mm+ rotors are essential, not optional.
Your stopping distance at 30 mph is roughly double what it is at 20 mph. At 40 mph, it quadruples. Factor in reaction time, and you need significant space to stop safely. Before chasing speed, ensure you can stop safely at those speeds.
Prevent Battery Overheating
Make sure your electric bike battery is not overheating, as excessive heat reduces voltage output and damages cells. When batteries overheat, internal resistance increases, reducing the voltage delivered to the motor—directly impacting top speed.
Lithium-ion batteries perform best between 60-80°F. Above 110°F, capacity decreases and degradation accelerates. Extreme heat can cause thermal runaway—a dangerous condition that can lead to battery fires.
Managing Battery Temperature
Store the battery in a cool, dry place away from direct sunlight. This prevents the battery from heating up or swelling due to excessive exposure. Ideal storage temperature is 40-70°F at 50-80% charge.
During rides, high current draw generates heat. Long hill climbs or sustained high-speed runs can push battery temperatures above safe levels. If your battery becomes hot to the touch during riding, reduce power demand and allow cooling before continuing.
Some e-bikes include battery temperature monitoring through the BMS (Battery Management System). If your display shows a temperature warning, stop riding and let the battery cool. Continuing to draw high current from an overheated battery risks permanent damage and safety hazards.
In hot climates, consider insulated battery covers with ventilation. In cold weather below 32°F, batteries should be warmed to room temperature before charging. Cold batteries also deliver reduced voltage, lowering your top speed until they warm up during use.
Relocate or Modify the Speed Sensor
The speed sensor helps regulate power output based on your current speed. Many e-bikes use this sensor to enforce speed limits programmed into the controller. By relocating or modifying the sensor, you can sometimes bypass these limits.

Understanding Sensor Types
There are two major types of sensors: torque and cadence. Understanding how each sensor works prevents costly mistakes and helps you modify safely if you choose to.
Cadence sensors detect pedal rotation and activate the motor when you pedal. Torque sensors measure how hard you're pedaling and adjust motor power accordingly. Most speed sensors are simple hall-effect sensors that count wheel rotations to calculate speed.
Speed Sensor Modification Methods
Some riders relocate the sensor magnet closer to the sensor, making it trigger more frequently and "trick" the system into thinking the wheel is spinning slower than it actually is. This can bypass speed limiters.
Another approach involves removing extra magnets from the wheel or adjusting magnet spacing. Some speed limiters check for a certain number of magnet passes per time unit—altering this changes how the system measures speed.
For Bosch and other proprietary systems, speed sensor modification is particularly difficult. These systems are locked down with encryption, and the motor unit logs modifications permanently. Attempting to bypass Bosch speed limiters typically voids the warranty entirely and may brick the system.
Upgrade to Performance-Ready E-Bikes
Rather than extensively modifying entry-level e-bikes, consider upgrading to models designed for higher performance. The Himiway C5 features a powerful motor system designed for off-road performance and can handle demanding riding conditions that would overwhelm standard commuter e-bikes.
For riders seeking legitimate speed in a complete package with proper components—including robust braking systems, reinforced frames, and appropriately-rated electrical systems—performance-oriented e-bikes deliver capabilities that piecemeal modifications can't safely match.
Additional Speed Optimization Tips
Beyond the major modifications above, several smaller optimizations compound to improve speed and performance.
Chain and Drivetrain Maintenance
A dirty, dry chain creates friction that wastes power. Regular cleaning and lubrication can recover 1-2 mph that's lost to drivetrain resistance. Use quality bike-specific lubricant and wipe off excess to prevent dirt buildup.
For mid-drive motors, chainline optimization matters even more. Ensure your chain runs straight from the motor to the rear wheel without extreme angles that increase friction and wear.
Reduce Unsprung Weight
Weight on the wheels (tires, tubes, rims) affects acceleration more than weight on the frame. Upgrading to lightweight wheels and tires improves acceleration, making your bike feel faster even if top speed remains similar.
Gear Ratio Optimization (Mid-Drive Motors)
For mid-drive e-bikes, you can change chainring or rear cassette sizes to optimize for speed. Larger front chainrings or smaller rear cogs increase top speed but reduce low-end torque and hill-climbing ability. This is essentially adjusting your bike's "final drive ratio."

Frequently Asked Questions
A 1500W e-bike typically reaches 28-35 mph depending on voltage. With a 48V battery, expect around 28-32 mph, while a 52V system can achieve 32-35 mph. The actual top speed depends on motor winding (KV rating), rider weight, terrain, and tire size. Remember that wattage primarily affects acceleration and hill-climbing, while voltage determines top speed.
Yes, you can increase your e-bike speed through several methods: upgrading to a higher voltage battery (most effective), adjusting LCD settings to remove speed limiters, optimizing tire pressure, improving aerodynamics with better riding position, or upgrading the controller. However, always check local regulations and manufacturer warranties before making modifications that could affect safety or legality.
High-performance e-bikes can reach 45-60+ mph, though most are classified as electric motorcycles at those speeds and require registration. Legal Class 3 e-bikes in the US are limited to 28 mph with pedal assist on public roads. Performance models like the Himiway C5 and D7 Cobra offer powerful motor systems capable of higher speeds in off-road or private property settings where regulations don't apply.
Many e-bikes allow speed limit adjustments through LCD display settings using specific button combinations (often holding up and down buttons simultaneously for 5 seconds, or pressing a sequence). However, unlocking methods vary significantly by brand—some systems like Bosch are completely locked down and cannot be modified without voiding warranties. Always check your manual and understand that removing speed limiters may violate local laws and void your warranty.
Yes, voltage directly affects top speed. A motor's maximum RPM is determined by voltage due to back EMF (electromagnetic force)—48V systems typically max at ~35 mph, 52V at ~38 mph, and 60-72V systems can exceed 40 mph. However, your controller and motor must both be rated to support the higher voltage safely, or you risk component damage, overheating, and potential fire hazards.
Not necessarily. Motor wattage primarily affects acceleration and hill-climbing power, not top speed. Top speed is determined by voltage and motor winding (KV rating). A 750W motor at 48V won't go faster than a 500W motor at the same voltage with the same KV rating—both will hit the same top speed, but the 750W motor will get there faster and climb hills better. To increase top speed, you need higher voltage or a motor with faster windings.
Yes, significant safety concerns exist. Standard bicycle brakes are often insufficient above 25-30 mph, stopping distances increase dramatically (doubling from 20 to 30 mph), and component stress rises substantially. Before increasing speed, ensure you have hydraulic disc brakes with large rotors (180mm+), quality tires rated for higher speeds, and a frame designed for the stresses. Always wear appropriate safety gear including a full-face helmet at speeds above 30 mph.
Age requirements vary by state and e-bike class. Most states allow riders 16+ for Class 3 e-bikes (28 mph), while Class 1 and 2 (20 mph) may have lower age limits. Some states require no minimum age with adult supervision. A few states require licenses for Class 3 e-bikes. Always check your specific state regulations as they vary significantly.
Most modifications will void your warranty, especially those involving electrical components (battery, motor, controller). Manufacturers like Bosch track modifications in diagnostic logs that technicians can access during service. Before making changes, carefully review your warranty terms. Simple adjustments like tire pressure, LCD settings within normal parameters, and regular maintenance typically don't void warranties, but battery, motor, controller, or speed limiter modifications usually do.
Larger wheels increase top speed but reduce acceleration and torque. Upgrading from 26" to 29" wheels can add 2-3 mph to top speed because each motor rotation covers more distance. However, you'll experience reduced low-end power for hill climbing and slower acceleration from stops. This is why many high-speed e-bikes use larger wheels while mountain e-bikes stick with smaller wheels for better torque and maneuverability.
Safety Considerations: Speed Requires Responsibility
Before implementing any speed modifications, understand that with increased speed comes exponentially increased responsibility and risk.
While riding your electric moped or high-speed e-bike, always obey road and legal regulations. State and local laws define where and how fast you can legally ride. Violating these laws can result in fines, confiscation of your bike, and liability in accidents.
Essential Safety Gear for High-Speed Riding
Prioritize safety and wear appropriate protective equipment. At speeds above 28 mph, consider motorcycle-grade protection:
- Full-face helmet: Standard bike helmets aren't rated for impacts at 30+ mph
- Armored jacket: Provides abrasion resistance in crashes
- Gloves: Protects hands and improves grip
- Sturdy footwear: Provides ankle support and protection
- Eye protection: Prevents debris and insects at high speed
Skill Development Before Speed Increases
If you're a novice rider, it's highly recommended you ride at slow speeds initially. Practice fast riding in controlled environments like empty parking lots until you're confident about taking your bike to the street.
High-speed e-bike riding requires different skills than casual cycling. Emergency braking, cornering at speed, obstacle avoidance, and maintaining stability all become more challenging and critical as speed increases.

Conclusion: Smart Speed Upgrades
Making your e-bike faster is entirely achievable through the methods outlined above. The most effective modifications are voltage upgrades, controller optimization, and removing unnecessary speed limiters through LCD settings.
However, not all modifications make sense for every rider. Before spending money, identify your specific goals: Do you need better acceleration or higher top speed? Will you primarily ride on roads or off-road? What are the legal restrictions in your area?
The smartest approach follows this priority order:
- Optimize what you have: Proper tire pressure, LCD settings adjustment, improved riding position
- Upgrade safety first: Better brakes before more speed
- Incremental power increases: Start with controller before battery/motor
- Legal and warranty consideration: Understand the implications before major mods
For many riders, purchasing an e-bike designed for higher performance is more cost-effective than extensively modifying an entry-level model. Consider exploring Himiway's full e-bike lineup to find models engineered for the performance level you're seeking.
Remember that speed is just one aspect of the e-bike experience. Range, comfort, reliability, and safety are equally important. The best e-bike setup balances all these factors to match your specific riding needs and environment.


I have a bike wanted to learn how to fix my bike, very knowledgeable app.